
Saturday, November 26, 2011
Red onion seedlings
In about 4 days seedlings have come up. 25 of the 36 seeds I planted have sprouted. The ones that have not sprouted I am not worried about. They may come up in a few days or not at all. If they do not more will be planted.

Tuesday, November 22, 2011
Red onion seed starting
So I picked up a 72 slot seed starting kit from Lowes, which is actually two 36 slot setups. It has a plastic tray which houses 36 growing slots. There is a plastic dome which goes on top to hold in moisture. Each one of the 36 slots has a peat pellet that expands when warm water is applied to it. The seeds being used are Ferry-Morse "Red Burgundy" onions. Plant the seeds about 1/2 inch deep and cover with the soil. Seeds should sprout in within 10-12 days. I am in zone 9-10 so I should plant these December - March.

This is planted dirt with the plastic cover on. They have been started inside and are sitting under a CFL grow light for 16 hours a day. When the seedlings start showing up I will remove the cover. That is after they reach about an inch in height.

Hopefully soon I can post an update to this with pictures of little seedlings. For something like onions where you want a large quantity of them seeds are a good choice. When it comes to an item that you want only 1-6 plants, get a started plant from your nursery. Seeds only good for the year they are made. After 2 years you only get about a 40-50% success rate. Use eBay with caution for seeds. Personally I have experienced mixed results, however sometimes it is the only place to get that "one" seed.
Friday, November 18, 2011
Still diggin
I am still digging out the garden so there is no real pictures to show as far as progress goes. It is going a little slower than I would like it to but I want it done right. The pvc pipe connecting the four old garden beds is being dug up as well as the old drip systems. Each of the old beds had 16 square feet of growing space for a combined size of 64 square feet. This new raised bed is 5' x 24' and 120 square feet. That is a heck of a lot more space.
These are some of the vegetables grown in the old beds.

Four different types of carrots. Solar yellow, white, purple and regular orange. Roma tomatoes and a lone orange tomato. White and red onions, okra and sugar beets.
These are some of the vegetables grown in the old beds.

Four different types of carrots. Solar yellow, white, purple and regular orange. Roma tomatoes and a lone orange tomato. White and red onions, okra and sugar beets.
Tuesday, November 15, 2011
Composting
Another new addition to the garden is a compost bin. For about $40 at a local hardware store I picked up a 115 gallon compost bin made by GardenPlus. It is made of 90% recycled materials. The bin snaps together and seems to be of good quality. Some of the reviews of the unit are negative but I found those accusations to be unfounded. Total time to put it together was about 10 minutes and I was taking my time.

My reasons for composting is basically being frugal. I turn yard waste and vegetable waste into fertilizer. All grass and plants taken out of the garden are going into the bin. There is a lot of pine cones, pine needles, leaves and other yard waste I can throw into the bin. Along with the yard waste can go banana peels, spoiled vegetables, paper and coffee grounds can go in.
Things that can go into the bin:
It is pretty simple to compost. Add 50% green and 50% brown, water and air. Nature will break this down into compost. You will need to turn the pile and make sure it is moist or it will rot and not compost. Easy enough with a pitchfork or a special tool you can buy at the hardware store.

My reasons for composting is basically being frugal. I turn yard waste and vegetable waste into fertilizer. All grass and plants taken out of the garden are going into the bin. There is a lot of pine cones, pine needles, leaves and other yard waste I can throw into the bin. Along with the yard waste can go banana peels, spoiled vegetables, paper and coffee grounds can go in.
Things that can go into the bin:
- yard waste - grass clippings, leaves, pine cones/needles, tree limbs.
- vegetable waste - banana peels, apple cores, onion skins, anything vegetable and fruit related.
- paper - shredded documents, junk mail.
- coffee grounds, tea, anything else that was once a plant.
- Water from cleaning out your aquarium.
It is pretty simple to compost. Add 50% green and 50% brown, water and air. Nature will break this down into compost. You will need to turn the pile and make sure it is moist or it will rot and not compost. Easy enough with a pitchfork or a special tool you can buy at the hardware store.
Monday, November 14, 2011
The plan 2011 thus far
So with the garden being transformed into a 24' x 5' growing space I have figured out the basic starting plans.

The red circles represent tomatoes. They are spaced 18" apart divided by 36". The tomatoes are 12" from the sides of the garden. One row of three will be Roma and will be used for canning. The other row of three will be either beefsteak or another large red sandwich tomato. The two black circles will be for black krim, lemon boy or Mr. stripey, just for fun. Yellow onions(orange circles) will be about 40-48. I use these a lot for grilling. Green represents garlic, about 36 bulbs. Blue is for carrots. This year they will be just regular orange carrots. No multicolor heirloom varieties. Not a significant difference in taste in my humble opinion. The brown is for red onions, about 26 of them.
This will leave me with space for egg plant, cucumber and then maybe potatoes. Greens such as herbs and lettuce are to be grown as well but will not be in this planter bed. Other options are hot peppers such as jalapenos and herbs.
Friday, November 11, 2011
Quick status update
Progress is going ok. Right now obviously I have the raised bed frame completed. It has been back breaking work to remove the grass and overgrown old beds vegetation. The garden is 1/3rd of the way cleared and work will probably take another week. Then it will take about 10-12 loads of topsoil to fill the bed. I have declined the free fill dirt the city has to offer. It is free but full of unknowns, properly composted topsoil will outperform the fill.
Another thing is a composting setup. That will be featured another blog entry.
Another thing is a composting setup. That will be featured another blog entry.
Tuesday, November 8, 2011
Here we go again.
So I bought four - 2"x12"x12' and a 2"x12"x10' board. The 2"x12"x10' was cut in half. Some Olympic redwood deck and weatherproofing stain was applied to the wood. It was assembled with galvanized framing hardware. In the end it came out to approximately 5'wide by 24' long. This raised bed is actually surrounding my original four 4'x 4' plots and then some.

As you can see my old garden fell into disrepair and became overgrown. The egg plant is the lone half dead plant in the picture. If you try this yourself make a note that the 2"x12"x12' boards are over 50 pounds a piece. Next thing for tomorrow will be to dig up the grass and weeds. With a bed this size it will take appox. 120 cubic feet of topsoil to fill. That will be 10-12 trips for my beat up pick up truck. In the meantime I will figure out plumbing for the irrigation.

As you can see my old garden fell into disrepair and became overgrown. The egg plant is the lone half dead plant in the picture. If you try this yourself make a note that the 2"x12"x12' boards are over 50 pounds a piece. Next thing for tomorrow will be to dig up the grass and weeds. With a bed this size it will take appox. 120 cubic feet of topsoil to fill. That will be 10-12 trips for my beat up pick up truck. In the meantime I will figure out plumbing for the irrigation.
Friday, November 4, 2011
Lessons learned
So after a while, work got in the way and discouragement with the small plots of land cause the garden to become neglected. This time we will try things a bit different by analyzing what went wrong.
So the plan this time around.

Even though I had success with my garden there is room for improvement. For one thing it will take a lot of dirt to fill the new raised bed. The city has fill I can load in my truck and use. I will also be enhancing it with manure and bagged garden dirt. Will also be using leaves and pine needles for composting.
- 4' x 4' plots of land for the garden. While it made it nice for crop rotation it also limited my space for growing. Over crowding was necessary to plant every thing I wanted.
- Even thought I had 24" between 4'x4' plots to allow space for my lawn mower it was a pain. It was a good idea but bad in practice.
- Only used 4" boards to make the beds raised 3" above ground. This allowed the grass and weeds to easily invade the garden.
- Tried to grow too many things and too many heirloom vegetables.
- Drip irrigation is not the best solution for the garden. I found that the vegetables that were around the spray heads grew better than the ones at the drip heads.
So the plan this time around.

- Redo the garden so that is a 4' x 24' bed. This will solve 2 problems. One it will allow more growing space and two I will not have to mow between beds. However the garden may be slightly bigger as I will be cutting a 2 x 12 x 10' board in half. Being frugal I will probably make the garden a bit wider.
- I will use 2" x 12" x 12' boards to form the garden bed. It will raise the garden one foot above the ground. Hopefully it will keep the weeds at bay a bit more and also make it easier to tend.
- Focus on the vegetables I like to grill and pickle. Onion, carrots, egg plant, tomato, cucumber, peppers and some herbs.
- Use the drip irrigation but mostly the spray heads. Due to city code and state regulations I will use the drip irrigation system. If it is not permanent the city/state cannot ticket me.
Even though I had success with my garden there is room for improvement. For one thing it will take a lot of dirt to fill the new raised bed. The city has fill I can load in my truck and use. I will also be enhancing it with manure and bagged garden dirt. Will also be using leaves and pine needles for composting.
Saturday, March 12, 2011
Beds 2 progress.
Here I have bed number two. Yellow beans, brussel sprouts, peas and turnips.

As you can see things are growing nicely. The peas are about done and half the plants have died.
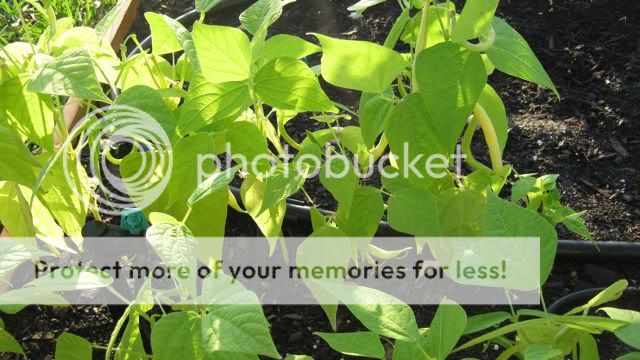
Here is a close up of the yellow beans. There are many beans to be picked.

Same with the peas.

As you can see things are growing nicely. The peas are about done and half the plants have died.

Here is a close up of the yellow beans. There are many beans to be picked.

Same with the peas.
Wednesday, March 9, 2011
It has been a while.
So have been too busy with work post an update in a month or two. So here we go with bed #1, onions, potatoes, sugar beets and carrots.

As you can see things have grown. The onions are huge and their stalks are over a inch in diameter. Carrots are coming in nicely and a second batch have been planted in the center front. The sugar beets are hit and miss. Some are doing well others are really small. Also planted a few new seeds to fill in the empty slots. In the front right is a tomato plant. That one I intentionally left in the fridge too long and we will see what we will get. Behind it are two actual seed potatoes just planted a week ago.

Check out how big the onions are getting. The carrots in the middle are getting big as well.
Friday, January 28, 2011
Zuchinni producing flowers
Not much of an update this time. The zuchinni is starting to produce flowers which in turn will fruit. As you can see it has quadrupled in size since I planted it. Other things of note is the Lemon cucumbers are a no go. The 2009 seeds apparently are no good. So they will be discarded. My seed potatoes are finally starting to chit.


Friday, January 21, 2011
Adjusting the spray heads
The wax beans are now starting to come in and the 180 degree spray head is no longer suitable. In its place are three 360 degree sprinkler heads. They have been adjusted to only water in the space allocated for the beans.

It is important to weekly check your system as the small spray and drip heads are easily clogged. This was the case with the strip sprayer on the peas. The obstruction could not be cleared so I put in a spare. Also you can see the twine I strung between the bamboo poles for the peas to climb.


It is important to weekly check your system as the small spray and drip heads are easily clogged. This was the case with the strip sprayer on the peas. The obstruction could not be cleared so I put in a spare. Also you can see the twine I strung between the bamboo poles for the peas to climb.

Wednesday, January 19, 2011
Seedlings - wax beans and okra
Things are really starting to take off. In this first picture is my second bed. On the right hand side you can see that the yellow wax beans have really taken off. The peas are on left side. I have put 3 foot bamboo posts in and will run twine between them. This will allow the peas something to climb. The beans will also get type of support.

Bed three has the two okra seedlings up front. They look really good and hopefully will produce well. In the center is that eggplant. Then 4 different tomatoes on the left and 2 different bell peppers on the right. Tomorrow a hot red cherry pepper will be planted. I will be pickling those when they come in.


Bed three has the two okra seedlings up front. They look really good and hopefully will produce well. In the center is that eggplant. Then 4 different tomatoes on the left and 2 different bell peppers on the right. Tomorrow a hot red cherry pepper will be planted. I will be pickling those when they come in.

Monday, January 17, 2011
The eggplant is indestructible
So after pulling the plastic off the garden yesterday the eggplant looked like it was dead. Well one day later and it is back strong. There are a couple leaves that look like the cold got to but other than that its healthy. On another note a couple of carrots have sprouted.
Sunday, January 16, 2011
Status update
Today I took the plastic sheet off the planter beds. It seems that the cold only killed one plant and that was the eggplant. I will give it a couple of days to see if it comes back. Some of the seeds I planted have sprouted. The picklebush cucumbers, okra, and sugar beets have all sprouted. Still to show up are the yellow wax beans, lemon cucumbers and carrots.
Thursday, January 13, 2011
Cold weather preparation
So here in sunny Southwest Florida we are expecting low temps into the 30's. This means its time to cover up the plants so that they survive the cold. Most of the stores are out of the plant covering material but that is very expensive anyways. I am using 3 mil plastic sheet found in the paint isle of Lowes. It is not ideal but will work. Other options people use are septic drain field liner and landscape weed block. To hold it up off the tops of the plants I cut pvc pipe 18" in length and then pounded it into the ground. The plastic sheet was put over the beds and held down with landscape stone. We will see in a few days if the plants survived.


Monday, January 10, 2011
First blooms on the Roma tomatoes
In the past couple of days both of the Roma tomatoes have each produced a few flowers. From the time I have planted them they have doubled in size. Hopefully this is a sign of things to come.


Sunday, January 9, 2011
New plantings - part two
This is bed number three. I had two Roma tomatoes already planted and growing fast. Today I put in a Atkinson tomato and a Yellow tomato. That finishes out the row of tomatoes. In the foreground is a Yellow bell pepper and a Red bell pepper. Above that I planted two Okra seeds. Finally in the center is a egg plant. It looks pretty sick. I bought it 3-4 days ago and had kept it in the house and watered. For the tomatoes and egg plant 2 gallon per hour drip heads were used. On the peppers I used 1 gallon per hour drip heads.

It only took it an hour in the soil, sunlight and water to come back!

Bed four is not too interesting as of yet. There is the zucchini that was planted at the time of the original planting. I seeded three Picklebush cucumbers at the far side. In the middle I seeded three Lemonboy cucumbers. Those seeds were from 2009 and hopefully will work. If not I will go buy more. I used a 90 degree spray head for the seedlings. After the plants have grown to 2-4 inches I will install proper drip heads.

Til next time happy growing.
New plantings - part one
So I have had some time this Sunday to put in some more of my garden. Here is bed one. As you can see I had already planed a row of red and white onions. Between the two rows of onions are carrot seeds. They are orange, red, yellow, white and purple mix I bought off eBay. In the past I have had mixed results with eBay and seeds so check the feedback and make sure it is positive. On the other side of the 1/2 black plastic hose is another two rows of Georgia sweet onions. They were picked up from Lowes in a bunch of 60. I have used 23. Off to the right in the center is 3 rows of sugar beets also from eBay. Future plantings will include some celery and potatoes. My initial plan was celerac but I am going to change those to container grown. For the drip irrigation I put in a 90 degree spray head as individual drippers would be impractical. The spray pattern is contained to about 7 inches outside the box.

Bed two already has a row of peas and three brussel sprout plants. On the other side there are two rows of yellow wax beans planted. A 180 degree spray was installed for the yellow wax beans and a strip spray for the peas. Some more adjustment has to be done to the sprayer for the beans but that is for tomorrow night.


Bed two already has a row of peas and three brussel sprout plants. On the other side there are two rows of yellow wax beans planted. A 180 degree spray was installed for the yellow wax beans and a strip spray for the peas. Some more adjustment has to be done to the sprayer for the beans but that is for tomorrow night.

Saturday, January 8, 2011
Peas make an appearance
About 7 days after I have planted the seeds the peas stuck their heads above ground.

Some more planting and seeding will continue tomorrow.

Some more planting and seeding will continue tomorrow.
Subscribe to:
Posts (Atom)